Incorporating a large-scale graphic or scene is a fantastic way to define the personality of a room and express a unique aesthetic. A carefully selected wall mural interior adds depth, character, and a unique focal point that paint simply cannot match. Unlike traditional repeating patterns, these murals often feature a single, continuous image that covers the entire designated area, creating a powerful visual experience that commands attention. Successfully applying this type of wall covering requires careful planning and unwavering attention to detail, but the resulting dramatic effect is well worth the time and effort invested.
Essential Pre-Installation Preparation
Before your installation day arrives, proper wall preparation is non-negotiable for a perfect, long-lasting finish. The surface must be impeccably clean, uniformly smooth, and completely dry. Start by removing all existing coverings, filling any holes or cracks with spackle, and lightly sanding any residual texture or rough patches. For optimal adhesion, especially with self-adhesive (peel-and-stick) types or pre-pasted paper, the wall should be treated with a high-quality primer. This crucial step seals the surface and ensures the adhesive grabs firmly, preventing bubbling or peeling later on. You can find an incredible variety of designs, from subtle landscapes to bold geometric patterns, when you explore the world of mural wallpaper.
Choosing the Right Design for Your Room
The sheer scale of these decorative pieces means your choice of imagery will heavily influence the room's atmosphere and perceived size. For a soothing, peaceful environment, one might consider the tranquil scenes found in nature wallpaper. These designs often incorporate lush forests, towering mountains, or calm seascapes, effectively bringing the restorative feeling of the outdoors in to create a serene and restful backdrop. Selecting a design that perfectly complements the room's purpose and existing furniture is crucial for achieving a cohesive final look.
Personalizing Your Walls with Custom Prints
Sometimes, a pre-designed mural isn't quite the right fit for your specific artistic vision or the unique dimensions of your wall space. This is where custom wallpaper printing becomes an invaluable resource for interior design. By allowing you to upload and print your own high-resolution image, photograph, or original artwork, a bespoke printing service ensures a truly one-of-a-kind installation tailored precisely to your area. This option is also particularly useful for spaces with unusual angles or for integrating specific brand elements into a commercial environment.
Hanging the Initial Panel
The first piece of a wall paper mural sets the definitive reference point for the entire project, making accuracy here paramount. Begin by measuring the width of the mural panel and marking a corresponding line on the wall using a level. Do not rely on the ceiling or wall corner as a true vertical guide; walls are notoriously not perfectly straight. Whether your mural is pre-pasted, requires separate adhesive, or is peel-and-stick, align the first piece perfectly with your drawn vertical line before systematically smoothing it into place, working from the center outwards to eliminate air bubbles.
Aligning Subsequent Panels
Once the first panel is securely in place, the true skill of hanging full wall murals lies in the seamless and precise alignment of the subsequent pieces. Mural panels are almost always hung edge-to-edge, meaning there should be no overlap unless the manufacturer explicitly states otherwise. Carefully bring the next panel into position, meticulously matching the pattern at the seam before applying the rest of the panel to the wall. This meticulous process ensures the continuous image flows unbroken across the entire wall, which is necessary for achieving a professional and immersive finish.
Making a Bold Statement with Abstract Art
If your goal is to infuse a contemporary and energetic feel into a living area, studio, or corporate office, exploring the range of abstract wallpaper options is a definitive way to achieve it. These designs often utilize vibrant color fields, bold geometric shapes, and dynamic compositions to create visual movement and instant interest. They serve as excellent conversation starters and can brilliantly anchor a minimalist room by providing a powerful artistic element without the necessity of cluttering the space with many small decor pieces.
Exploring Textured and Dimensional Effects
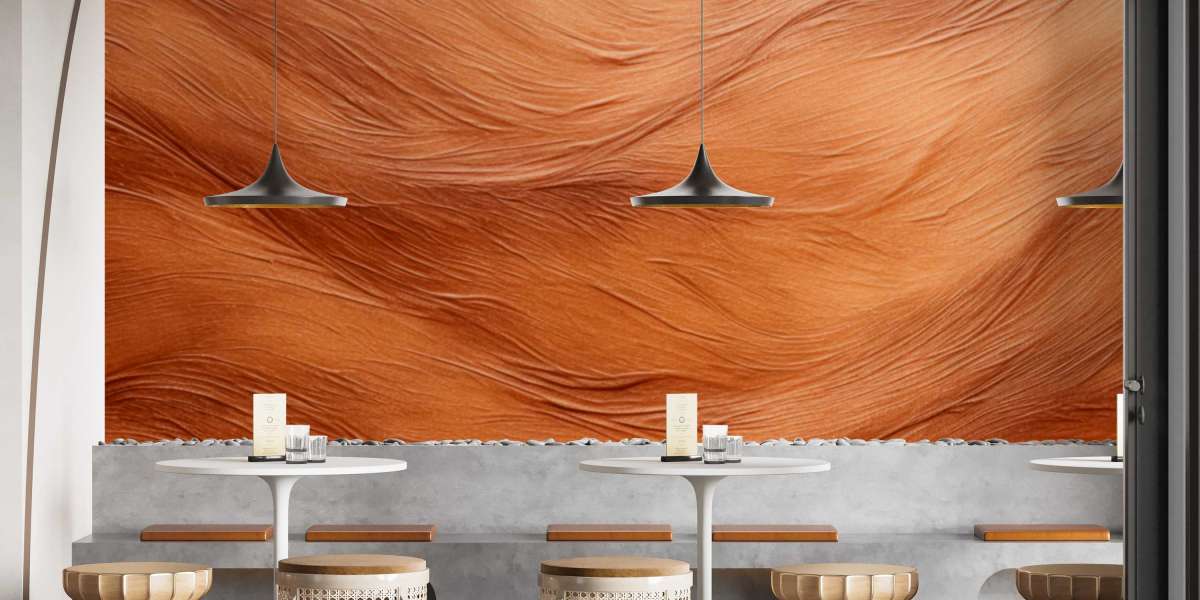
For homeowners and designers seeking a wall treatment that offers an experience beyond a flat, two-dimensional image, the market provides specialized coverings that add both physical texture and visual depth. Products like 3d wall paper for wall utilize sophisticated shading and printing techniques to cleverly create the illusion of depth, physical texture, or architectural elements such as bricks, stone, or geometric reliefs. These dimensional effects can introduce an unexpected layer of sophistication to the room, causing the feature wall to appear more dynamic and immersive to the viewer.
Finishing and Maintenance Tips
After all panels are successfully installed and smoothed, the final step involves trimming the edges. Use a brand-new, sharp utility knife and a long straight edge to carefully cut away any excess paper at the ceiling line, baseboards, and around door and window frames. If you used paste, clean any residue immediately with a damp, clean sponge. To protect your investment and ensure its longevity, keep the room’s humidity stable and wipe the surface only as instructed by the manufacturer’s care guide, typically using a soft, dry cloth or a slightly damp sponge for occasional dust removal. The successful application of your chosen wall covering ensures your room is elevated with a cohesive, impressive piece of large-scale art.